
MK3 GAMMAHA
These may not be the same as your bike it depends on the models you are using a Gamma mk1, mk2 or mk3 and LCII, FI or FII.{ GOOD LUCK }
ELECTRIC’S
Mount the CDI and rectifier assembly on the three mounts on top of the frame where the airbox used to be. The rectifier goes above. Mount the computer box on the rear mudguard behind the brake reservoir. Chamfer the side of the computer to miss the rear shock. The fuse box goes on the rear mudguard. the battery goes in the normal place with Gamma battery connections. mount the servo under the tank and the YPVS coils on the Gamma coil mounts.
Neutral light blue
Oil black/red
Temp green/red
Rear light blue/red
Rear light green/yellow
Rear light black
Dark blue
Blue/white
Black/green
Brown/red
White
Black/white
Neutral/oil/temp light brown
Orange
Part of 4 way plug
Indicators double dark brown
Black
Indicators single dark green
Light green
High beam yellow
Yellow
Gray part of 4 way plug
Earth black
Black white
YPVS LOOM
GAMMA BITS
If you are using the YPVS exhausts cut off the rear mounting brackets and reweld 60mm further back. You will need to put a flat or dent in the right exhaust to get the brake lever to clear.
EXHAUSTS
I found the bike ran hot with the standard rad . A 250lc rad will fit or a mk3 gamma rad is better If you are using a mk1 or mk2 that is. I tried both.
COOLING SYSTEM
and power valve cable adjuster housing~again, this is to miss the frame.
File off the front of the left hand power valve cover
File of the lip on the lower rear edge of the right hand crankcase/clutch cover joint face to clear the frame. Shorten, then file, the left hand plastic crankcase cover below and behind the gear shaft.
This is the rear engine mounting plate
COVERS
Use the Gamma engine bolts. Make two spacers up for the front engine bolts; 50mm on the left and 18mm on the right. This centralizes the engine in the frame and lines up the sprockets. For the rear top mounting make up two small plates 30mm wide with two10mm holes drilled 27mm apart.The shortened engine bolt goes through the lower holes in these two plates; the top holes line up with brackets on the frame so you need two short bolts here.
ENGINE MOUNTING
Hear are some helpful hints and tips on building one yourself.
The rigid alloy box frame and swinging arm make a good and cheap way to improve on the handling of a power valve. there are a lot of chassis around due to the slow weak 250 lump that Suzuki put in , they blow up at an alarming rate . Usually trying to keep up with a power valve he he .
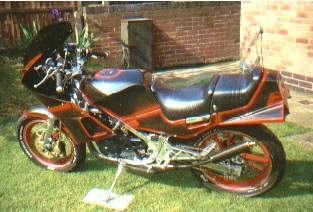
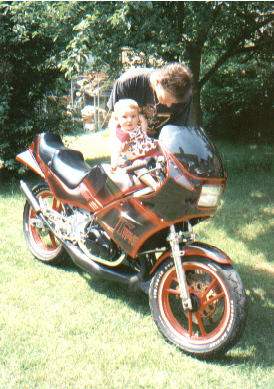
My MK 1 YAMMAGAMMA
This is my Gammaha. I built it about 10 years ago. It took quite some time to get right . I built, stripped and rebuilt it a few times in its life with me . Improving it each time with some custom pipes, tz end cans, brembo and lockhead brakes and finely a mad tune . It was a very very polished and chromed bike , and needless to say a sod to keep clean . It always got a lot of attention where ever it went and was worth all the stress it caused me in its many constructions .